Inhaltsverzeichnis
Single-Sign-On into Moodle using Admidio as an OpenID Provider
Starting with version 5.0, Admidio can be used by other applications to authenticate users against Admidio's user base. These instructions will guide you through the process of connecting Moodle to Admidio to use Admidio's login. For general instructions, and other apps, please visit the general Single-Sign-On overview page.
Moodle provides OpenID Connect login through the OpenID Connect (auth_oidc) plugin. In this tutorial, we will describe how to set it up properly for single-sign on using Admido's user accounts.
Prerequisites
Throughout the document we will assume you have both Admidio and Moodle already set up properly at https://admidio.local/ and https://moodle.local/. Please modify these URLs to your actual installation.
As a first step, one needs to configure Admidio to act as an OpenID Provider (OP). This has to be done once and is not specific to any particular client. Please folow this guide:
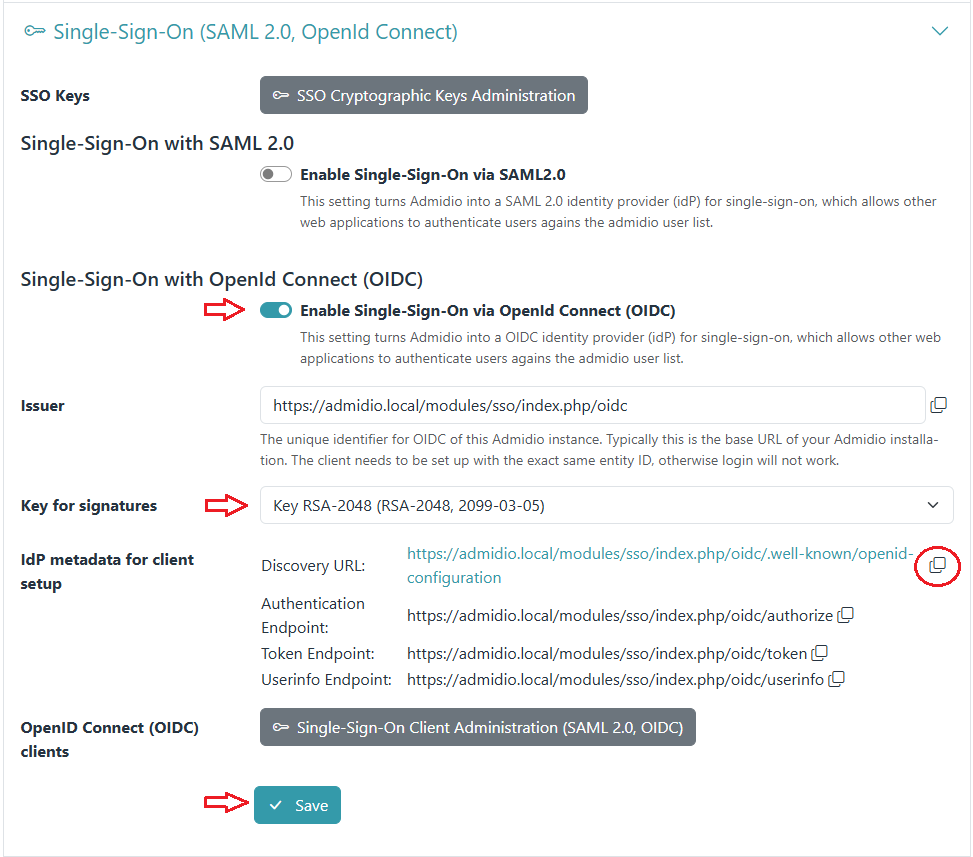
Basically, one needs to enable OpenID Connect (OIDC). The Issuer URL should in most cases be left blank, which means Admidio's public URL will be used as issuer URL.
The page https://admidio.local/adm_program/modules/preferences.php?panel=sso also provides the link to the automatic discovery URL, and the individual settings for clients that do not support auto-configuration via metadata.
Quick Overview
Setting up a client (OpenID “Relying Party” = “RP”) to use Admidio's user accounts for log-in consists of two steps:
- The client (RP, Moodle in our case) needs to be set up with the data about the OpenID Provider (OP). One has to manually paste the Admidio endpoint URLs of the OpenID provider into the client's configuration. Admidio provides copy buttons in the preferences screen, so this is rather straightforward.
- Admidio needs to be told about the client. In particular, the entity ID and the redirect URL must be given, and a custom-generated (random) secret must be copied to the client configuration.
The concrete steps are:
- At the Relying Party (RP) - Moodlein our case - install the extension to support OpenID login.
- Configure it with Admidio's endpoint URLs for authentication, token and userinfo, and enter the EntityID. Auto-discover is currently not supported by the Moodle plugin.
- Also, choose which scopes (groups of profile fields) should be requested from Admidio (“openid” is required; Since the OpenID Moodle plugin does not support groups mapping, the “groups” scope is not relevant and has no use, but other profile fields might be useful.).
- In Admidio, create a new OpenID client.
- Choose an easily understood label for the client (only used in Admidio's list of clients, but has no technical use)
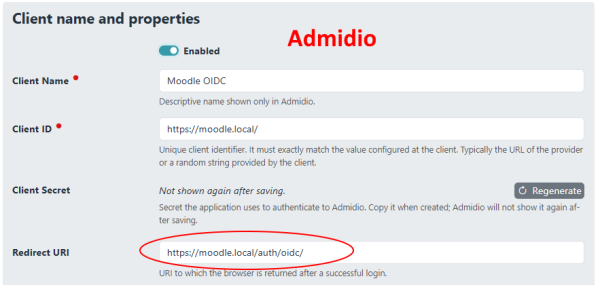
- Enter the ClientID from the RP, copy the created Client Secret (you will later need to paste it indo DokuWiki's configuration), and enter the Redirect URI for the RP. Typically the latter can be found either on the RP's configuration page or in the documentation.
- Moodle's OIDC clients does not support encryption (PKCE, which is a security mechanism that prevents attackers from obtaining access unless their application started the initial login). By default, PKCE is required by Admidio, so make sure that the requirement checkbox is turned off. Otherwise you will get an error.
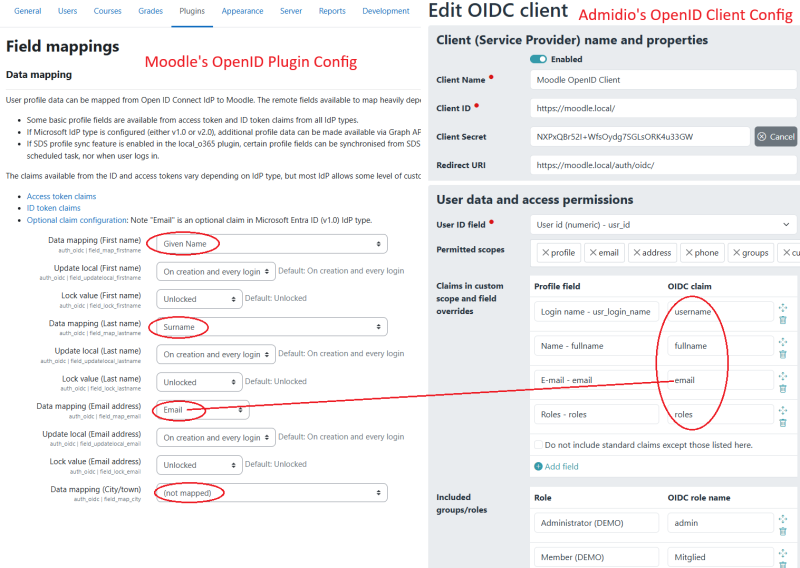
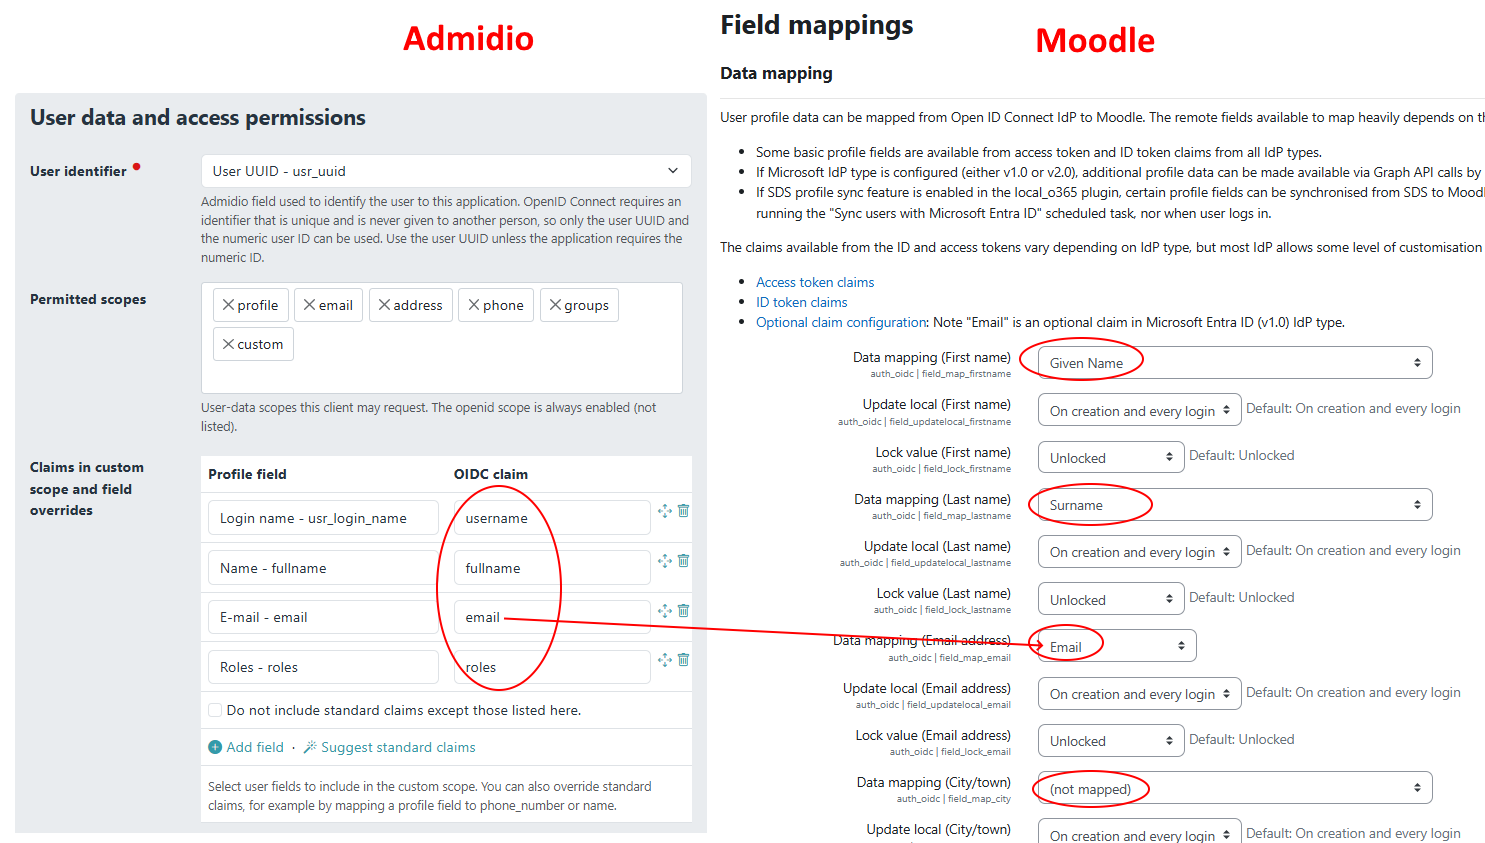
- In Admidio, map the user ID, username, email and fullname to fields that are included in the OpenID login response (so-called “claims”) and enter the corresponding claim names in Moodle.
Moodle Login via OpenID using the OpenID Connect user backend (user_oidc)
Configuring the IdP settings for the Relying Party (Moodle)
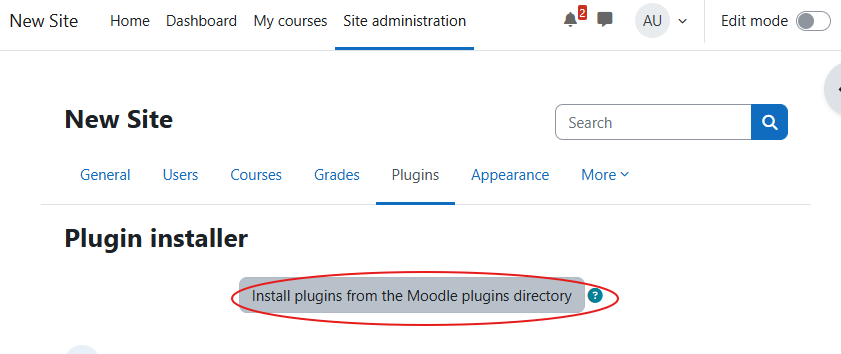
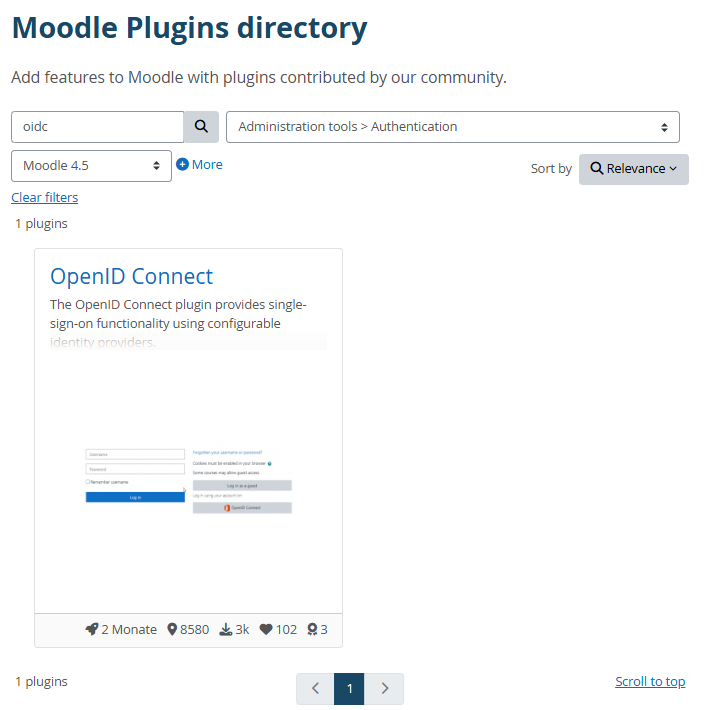
First, install the OpenID Connect (auth_oidc) app in Moodle from the plugin directory:
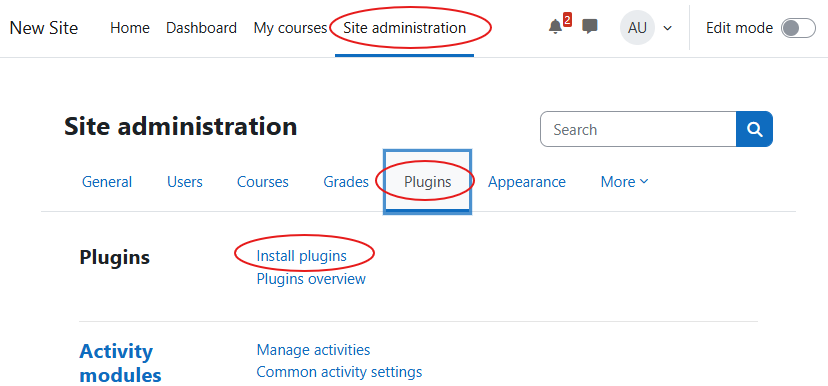
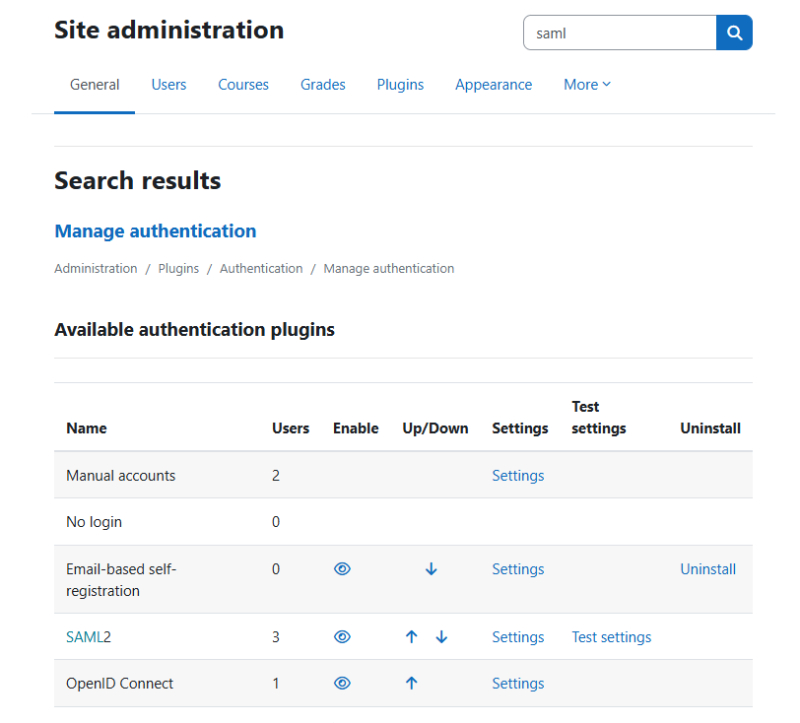
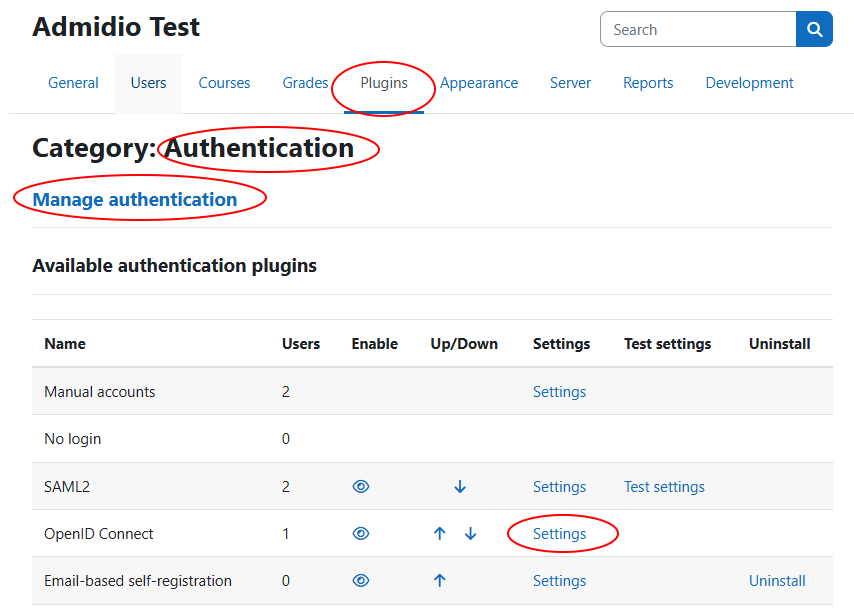
- After installing this plugin, go to the plugin list and scroll down to the “Authentication” section (or alternatively, use the URL https://[YOUR_MOODLE]/admin/settings.php?section=manageauths). The OIDC plugin should be shown together with a link to the settings.
- Go to the plugin's settings (either via the link in the plugins page, or in the menu item “Plugins” → “Authentication” → “OpenID Connect”).
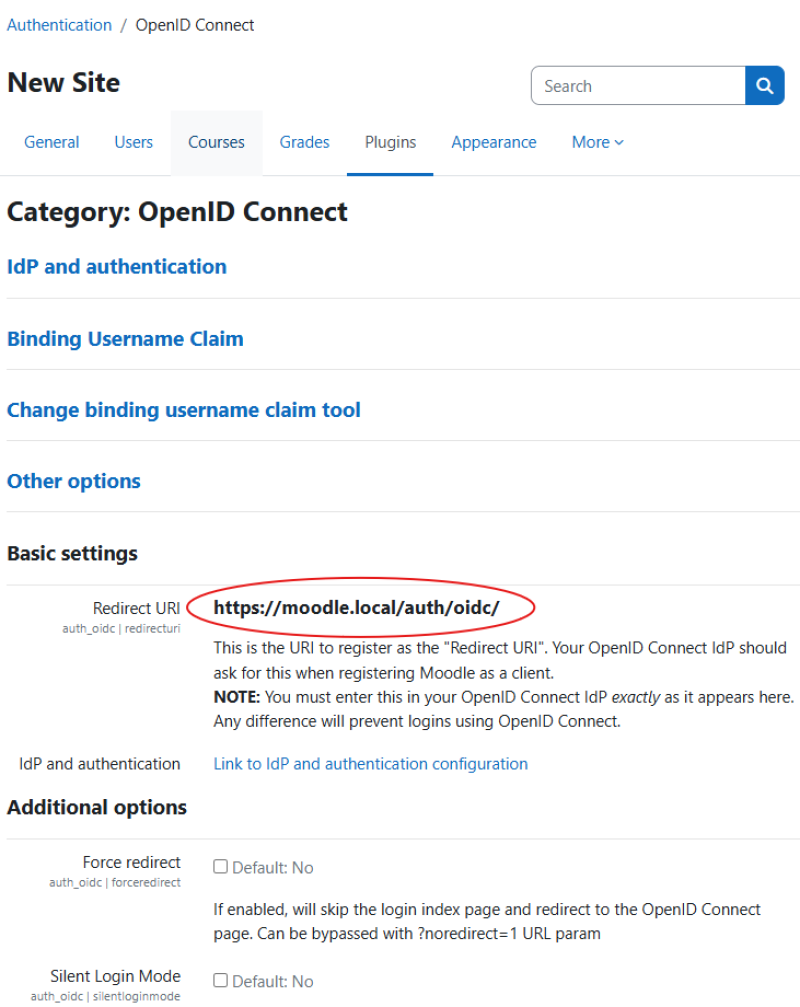
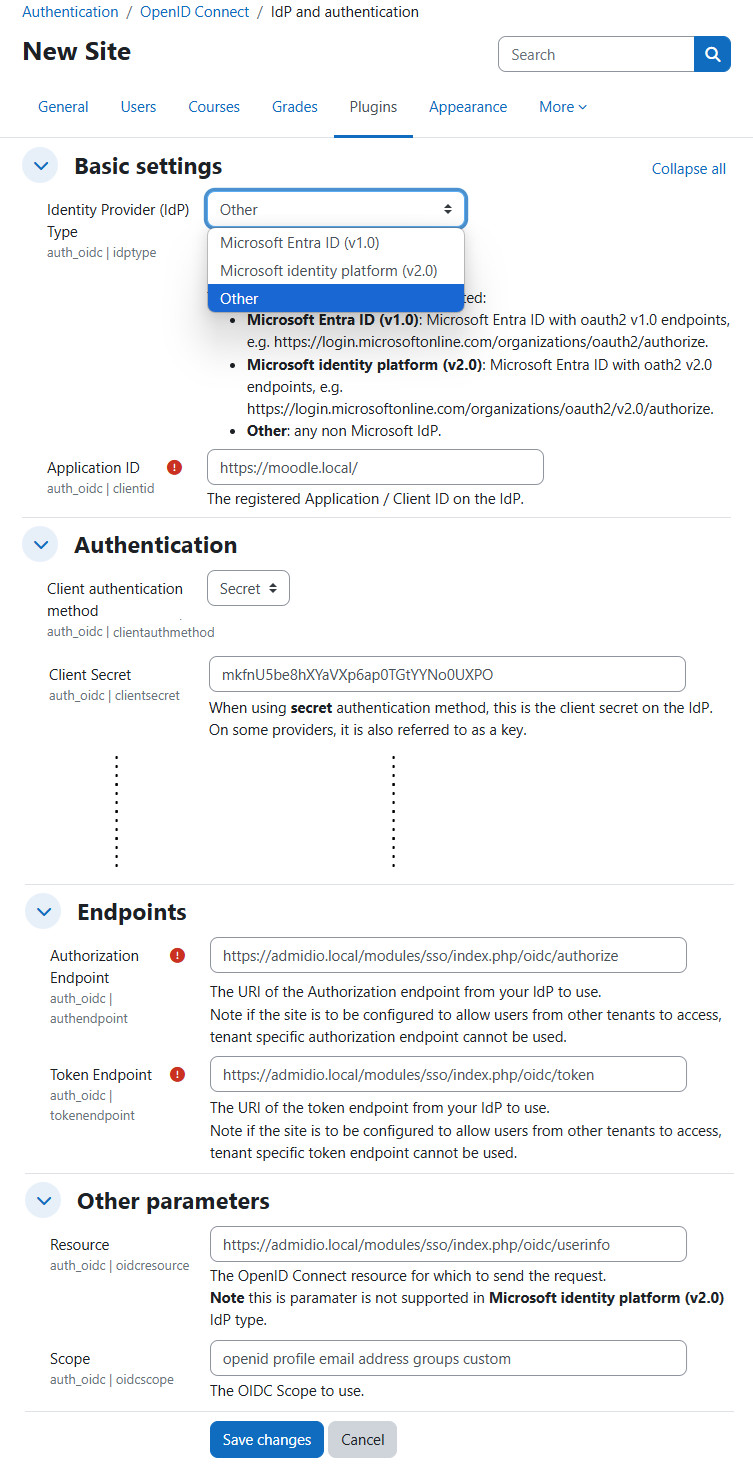
- The most important section is “IdP and authentication”, as it configures all endpoint URLs to talk to Admidio. The “Identity Provider (IdP) Type” is “Other”, the Application ID is OpenID's RP ID. It can be freely chosen, but should uniquely identify the moodle client.
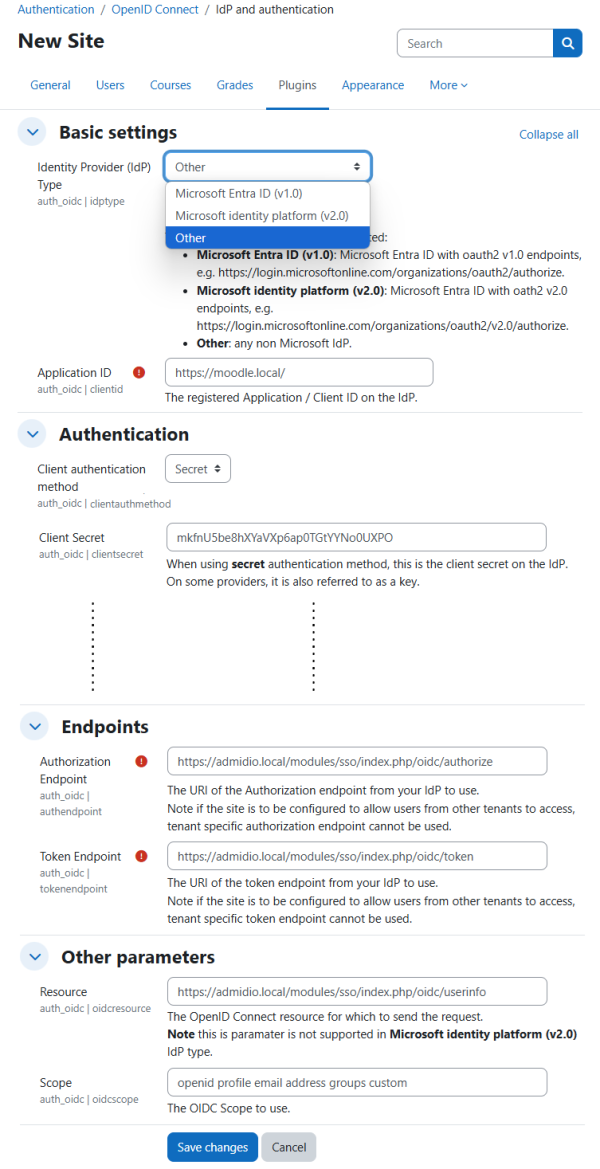
- It is now a good idea to keep two browser windows open with Admidio and Moodle's configuration so one can easily select and copy the settings. Admidio even provides little “copy” buttons/icons to copy the various settings to the clipboard for easy pasting into the Moodle configuration.
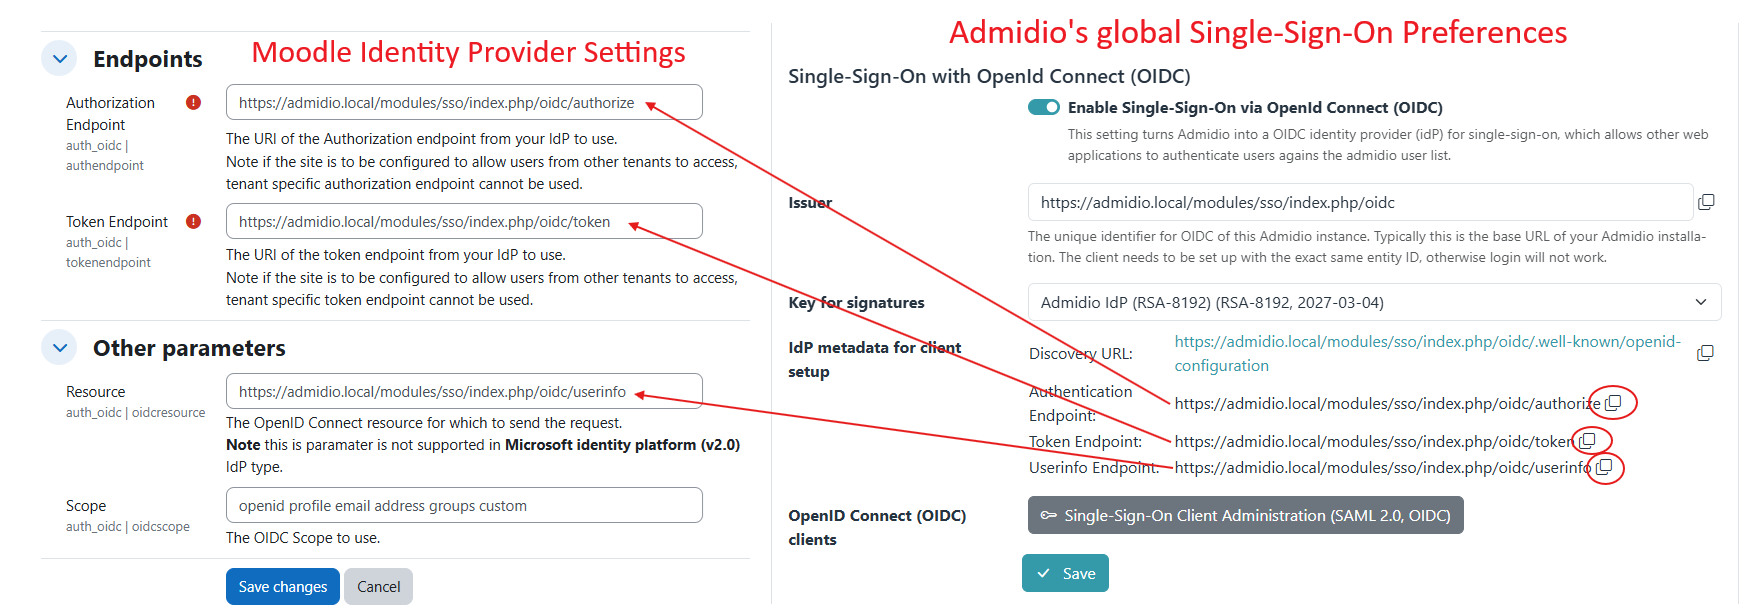
- Go to Admidio's Single-Sign-On Preferences and copy the endpoint URLs for OpenID (Authentication, token and userinfo endpoints). They should be pasted into Moodle's Client configuration as “Authorization URL”, “UserInfo URL” and “Token URL”.
Setting up the Client (RP) in Admidio
The next step is to set up Admidio to receive login requests from Moodle. This is done by adding an OpenID client in Admidio.
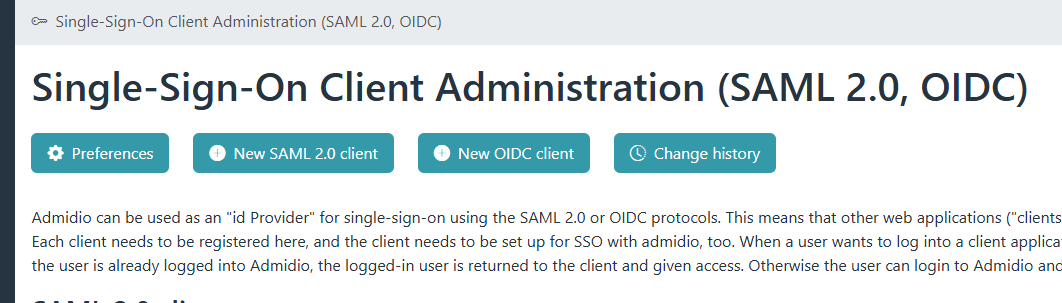
Return to Admidio's SSO preferences page, go to the “Single-Sign-On Client Administration” (the button right below the endpoint URLs and above the “Save” button), and create a new client.
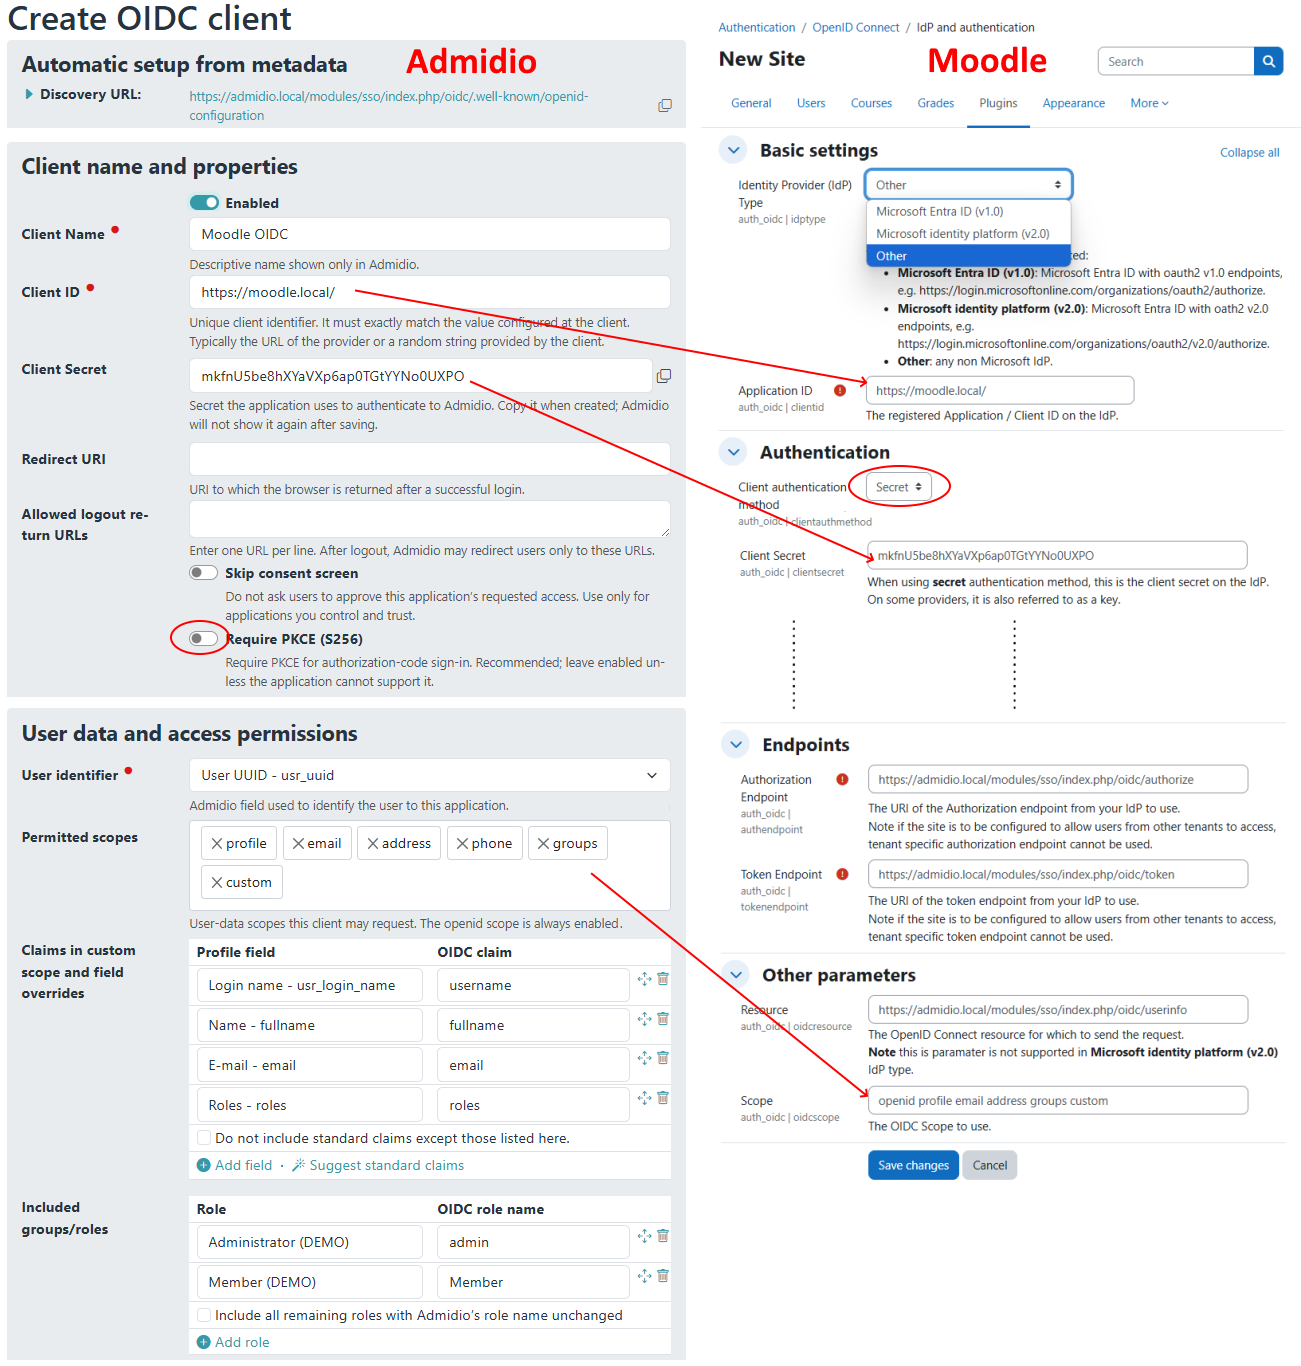
- The Client Name is the label of the client in Admidio's client list, it can be anything you like.
- The “Client ID” and “Client Secret” in Admidio and Moodle have to match exactly. The ID is typically the client's URL, although some clients allow any unique identifier. The Client Secret should a random string and will serve like a password. Admidio will create one and allow it to be copied to the client. Afterwards it is only stored as a hash in the database and not be recovered any more. However, one can create a new Client Secret in Admidio and copy that to the client's configuration.
- Moodle's OIDC plugin does not support PKCE, so it must be disabled for the OIDC client in Admidio to prevent errors.
- Enter the scopes you desire in the Moodle config and make sure that Admidio's config matches it. At least openid must be included (Admidio will implicitly add it). If group support is desired, the “groups” scope must be included (and the corresponding groups claim mapped, and group support selected in the Moodle config).
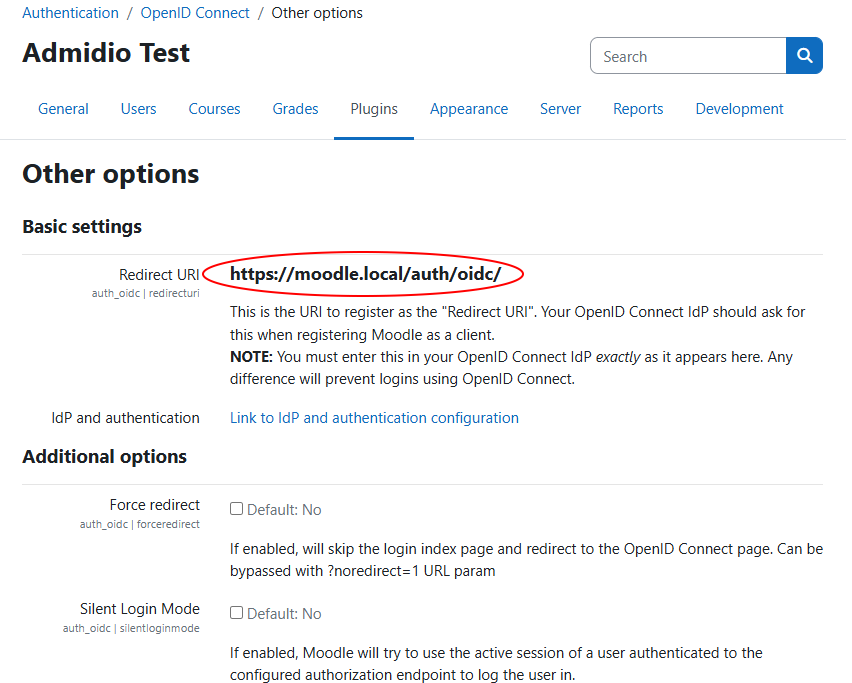
Now save the Identity Provider Settings in Moodle and return to the general OpenID connect settings of the plugin (https://[YOUR_MOODLE]/admin/category.php?category=oidcfolder).
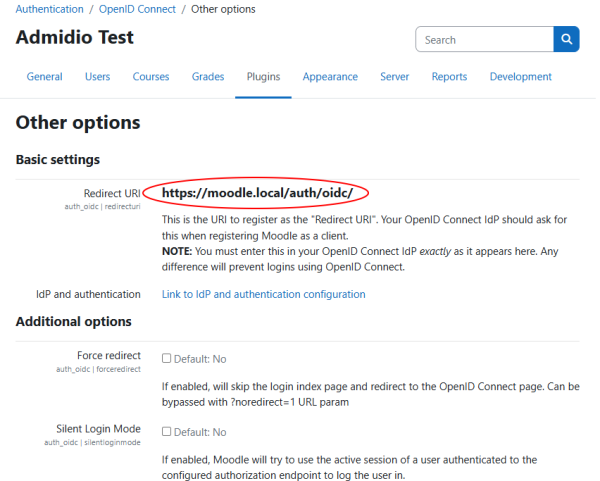
- Moodle will display its Redirect URL in the “Basic settings” section that must be entered in Admidio's settings. Enter this URL in Admidio.
- Most of the other options can be used for fine-tuning, but in most cases do not need to be changed.

After saving the changes (both in Moodle and Admidio), the apps should should now be set up for single-sign-on in Moodle.
Fields Mapping
OpenID Connect logins can transfer Profile field information from Admidio to Moodle, but this needs to be set up. In general, OpenID does only include the user identifier, but no other personal information. To allow individual pieces of profile data (a “claim” is one profile field), OpenID groups them into “scopes”, which are groups of profile fields, like “profile”, “address”, “phone”, “groups”, … Each of them allows access to some defined claims. In the Identity Provider Settings the scopes that are requested from Admidio can be configured.
However, Admidio also needs to be configured to map its profile fields to the defined OpenID claims.
- In Admidio, choose which field should be sent to and used by the Moodle Plugin to uniquely identify users. This would typically be the login name, although the user ID or UUID area also possible.
- In Moodle's OpenID plugin config, go to the “Fields mappings” section, where the OpenID claims can be mapped to Moodle's fields like “First Name”, “Last name”, “Email address”, etc.
Configuring Single-Log-Out

Setup completed, test Single-Sign-On
Admidio and Moodle should now be set up to use Admidio for logging in to Moodle. If you log out of Moodle and try to log in again, you will be shown the Admidio login screen and then redirected back to Moodle after a successful login.
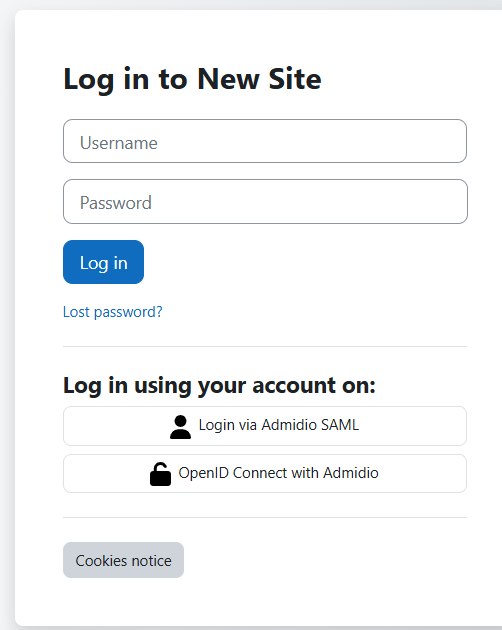
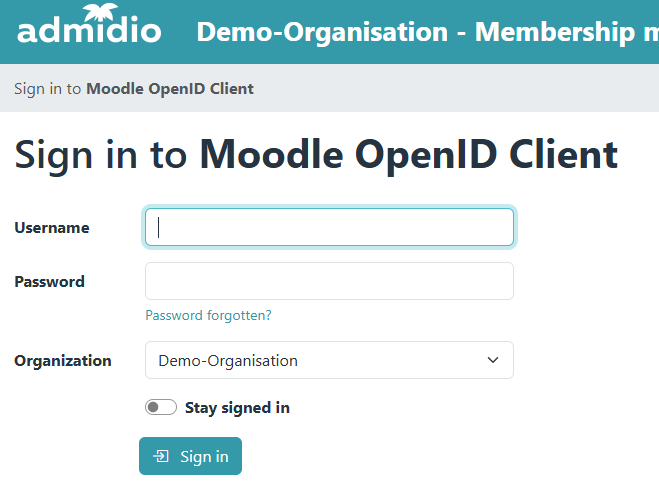
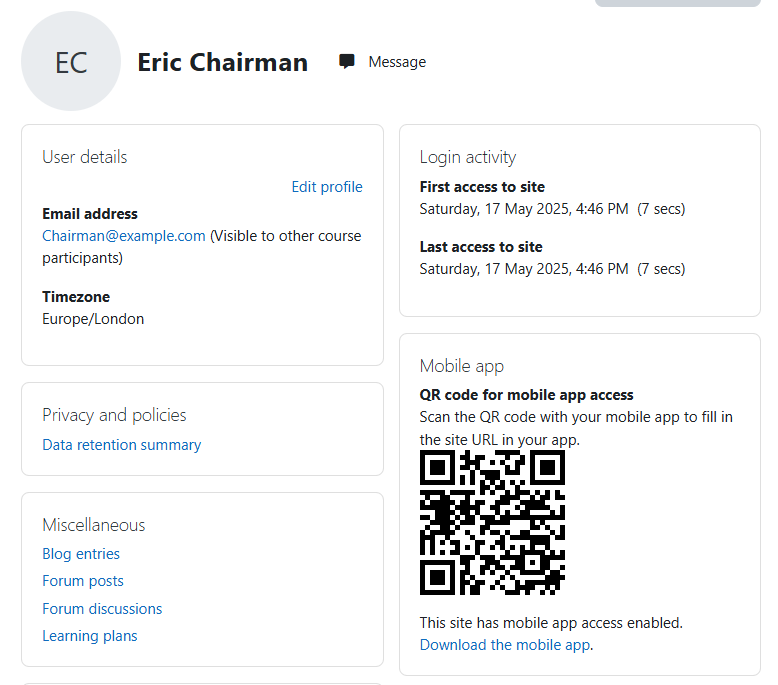
After choosing SAML login and loggin in with a user from Admidio, you should be logged in to Moodle.
Caveats and Things to Consider
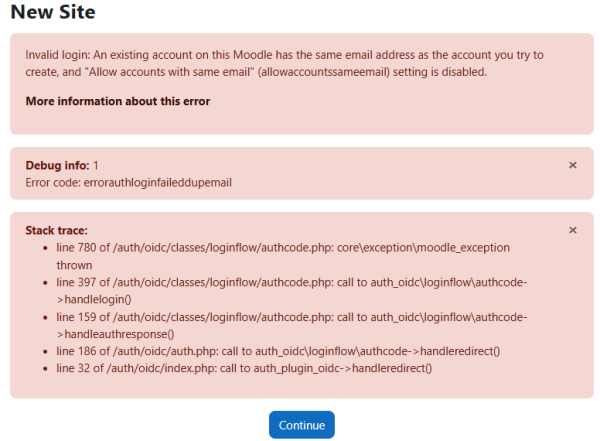
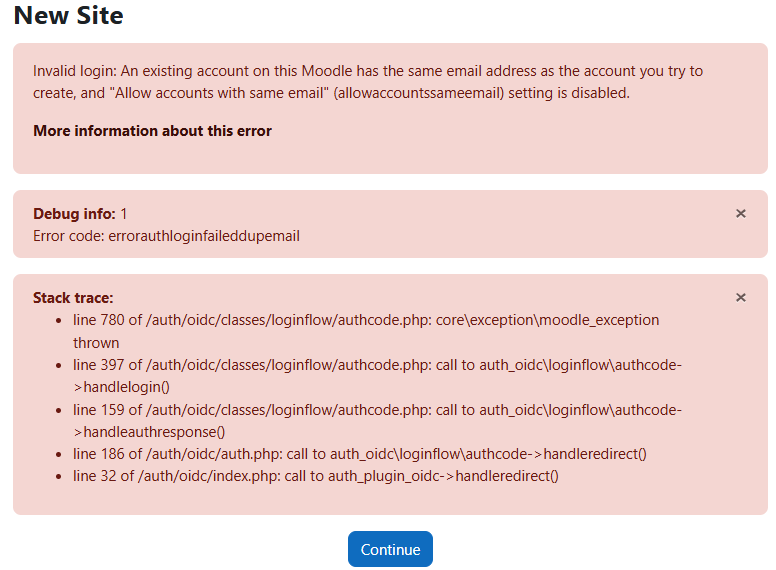
- If you have user accounts from different backends (e.g. local accounts, OpenID Connect login, SAML login) and an account for a user was already created, Moodle tries to match accounts by username (the field selected in the plugin config). However, if the other account has the same email address, but a different user ID through the SAML or local backend, Moodle will try to create a new account with the SAML user ID, but fails since another account with the same email already exists.